
In this part we are going to effectively deploy the bot in AWS so that we don’t need to run it locally anymore.
Dealing with Sensitive Information
The Discord Token is the kind of information that can be considered sensitive. A common approach for dealing with this is by using environment variables and a great tool for both development and production stages is python-decouple. We can get it ready in 3 simple steps:
pip install python-decouple- create a
.envfileDISCORD_TOKEN=ABC123 - remove the token from
bot.pyif __name__ == '__main__': TOKEN = config("DISCORD_TOKEN") bot.run(TOKEN)
Deploying the Discord Bot to AWS EC2
The Discord Bot stays alive through WebSocket, what means we cannot deploy it in a reactive service such as Lambda. Therefore, we will deploy it to the AWS Elastic Compute Cloud using Terraform. As a first action, let’s split the python code from the infrastructure code by putting all .tf files in a deploy directory.
AWS EC2 is a virtual computing environment, meaning we need to define a templated Amazon Machine Image to work on. For simplicity reasons, let’s use a Ubuntu Serve AMI that comes with Python pre-installed. By using the aws_ami data source, we can “easily” fetch the AMI ID.
data "aws_ami" "ami" {
  most_recent = true
  owners = ["099720109477"]

  filter {
    name   = "name"
    values = ["ubuntu/images/hvm-ssd/ubuntu-focal-20.04-amd64-server-*"]
  }
}
With that, we can create a aws_instance resource that’s going to host our bot. The aws_instance accepts a user_data parameter that we can use to configure and start the application.
variable "DISCORD_TOKEN" {}
variable "AWS_ACCESS_KEY_ID" {}
variable "AWS_SECRET_ACCESS_KEY" {}

resource "aws_instance" "discord_bot" {
  ami           = data.aws_ami.ami.id
  instance_type = "t2.micro"
  user_data = <<EOF
#!/usr/bin/bash
sudo apt-get update -y
sudo apt-get install python3-pip -y

git clone https://github.com/phvv-me/lincoln.git

export DISCORD_TOKEN=${var.DISCORD_TOKEN}
export AWS_ACCESS_KEY_ID=${var.AWS_ACCESS_KEY_ID}
export AWS_SECRET_ACCESS_KEY=${var.AWS_SECRET_ACCESS_KEY}
export AWS_DEFAULT_REGION=us-east-1

python3 -m pip install -r lincoln/requirements.txt
python3 lincoln/bot/main.py
EOF

  tags = merge(var.tags, {
    name = "${var.tags.project}-ec2-instance"
  })
}
Notice we set the DISCORD_TOKEN, AWS_ACCESS_KEY_ID and AWS_SECRET_ACCESS_KEY environment variables as an empty variable in terraform configuration. This means terraform is going to ask for its value when running terraform apply.
Configuring the Terraform Cloud
The process of retyping those credentials in every deploy can surely get exhausting, but we can configure a workspace in terraform cloud in order to skip this step.
- access [https://app.terraform.io/session][app.terraform.io] and create your free account
- click in workspaces and then in + New workspace
- Select CLI-driven workflow
- Give a name to your new workspace
- Copy the snippet that showed up and paste it in
main.tfinside theterraformblock. It should look like thisterraform { required_providers { aws = { source = "hashicorp/aws" } } backend "remote" { organization = "{your organization name}" workspaces { name = "{your workspace name}" } } } - Click on Variables
- Add
DISCORD_TOKEN,AWS_ACCESS_KEY_IDandAWS_SECRET_ACCESS_KEYas Terraform Variables marking them as Sensitive.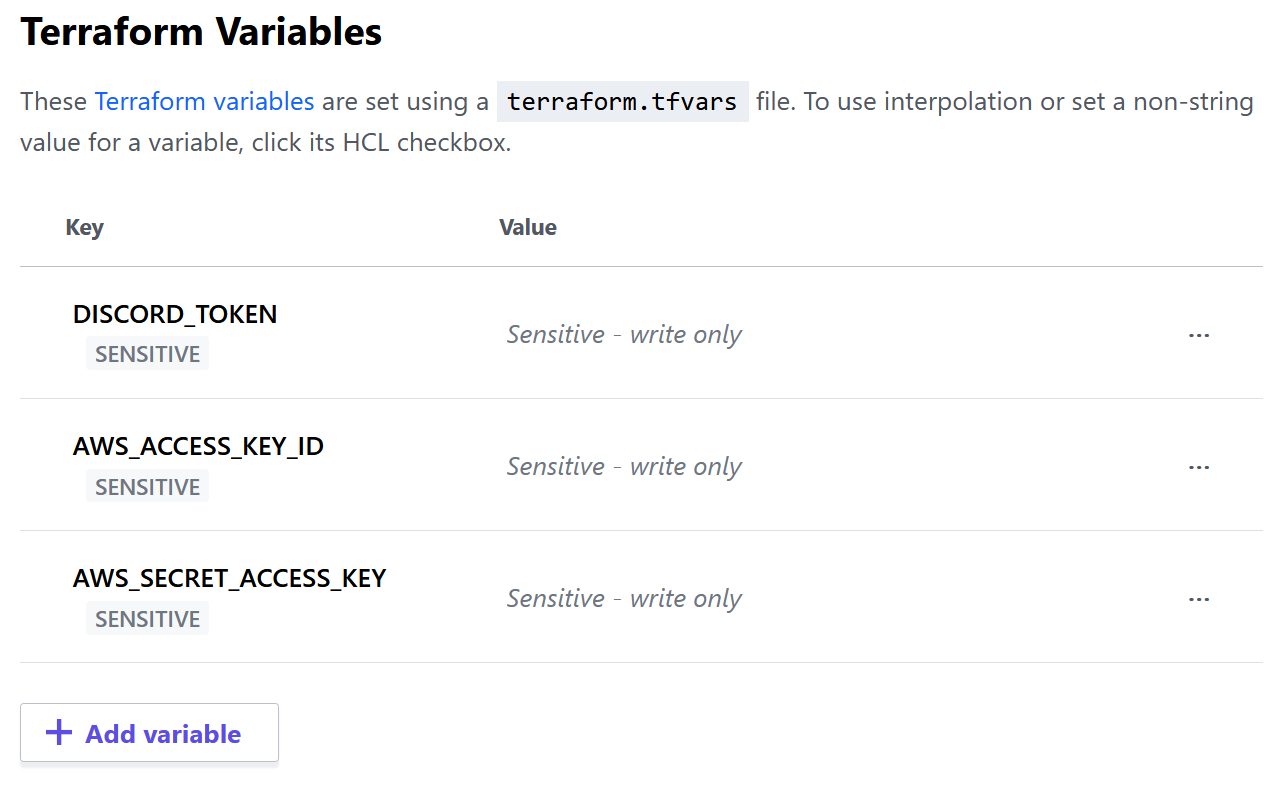
- Add
AWS_ACCESS_KEYandAWS_SECRET_KEYas Terraform Environment Variables marking them as sensitive (you can use the same values as before if they have a broad set of permissions because they will perform resource creation).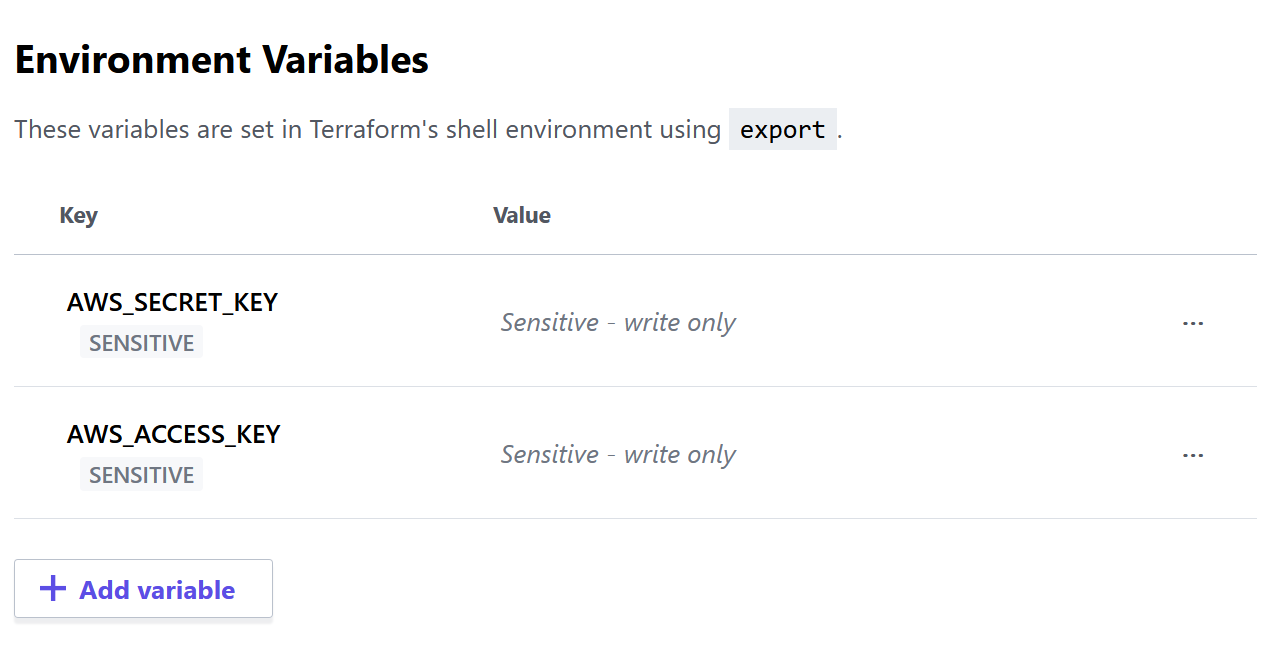
Now you can just run terraform apply and in a few minutes you shall have your bot waiting for your orders in discord again.